
Clara.io gives you the ability to create new render passes with new render settings and cameras. Starting on a fresh scene, the Passes list will be empty.
A quick way to create a render pass is by going to Render > Render Presets > Full V-Rat Setup. This applies all the necessary functions that come hand in hand with your render passes.emb.
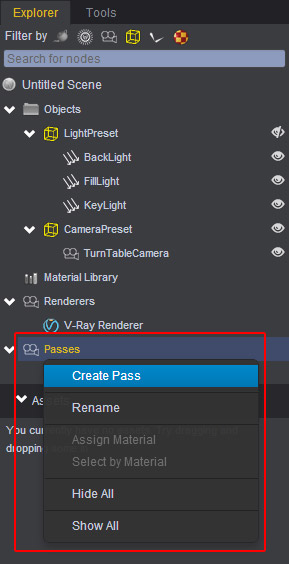
Alternatively, you can do things manually. From the Explorer, right click on Passes and select Create Pass.
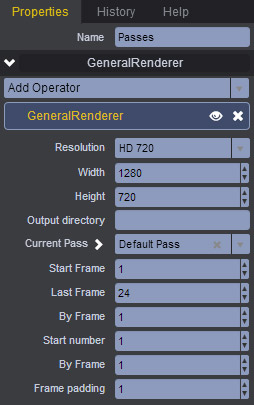
To access the Properties of your current pass, select the Passes icon from your Explorer. Now the Global settings will appear on the right of the UI. From here, you can adjust the final render’s resolution, and time line frame settings.
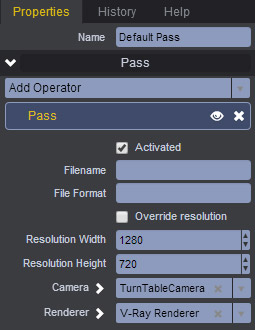
To access the settings of your newly created pass, make sure it is selected in the Explorer. From there, you can choose your renderer (in our case V-ray) and the camera you’d like to use.
To create more than one Pass with different render setups. Simply right-click on the Passes title from the Explorer and select Create Pass.
When you’re happy with the final results and would like to render a final image, go to *Render > Render Current Pass. This will execute the final render and save it to your hard drive based on the settings applied.