
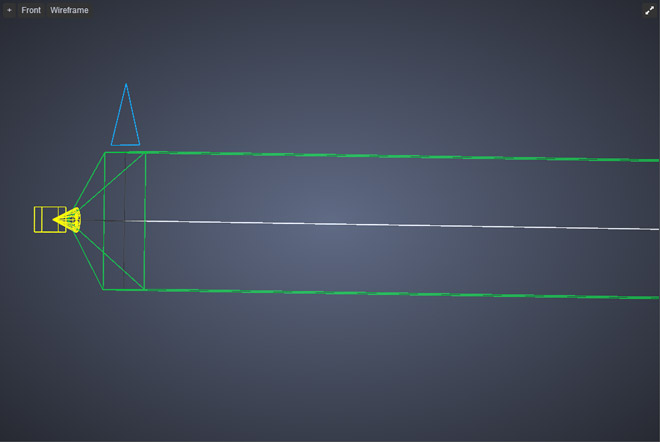
Orthographic projections shoot parallel rays from the camera. As a result, all objects appear the same in size, despite their distance from the lens. Orthographic projections come in handy for precise measurements when creating architectural and engineering renderings.
To use an Orthographic Projection, first you need to create a Camera.
There are several ways to achieve this:
Go to Rendering tab and click on the Camera icon
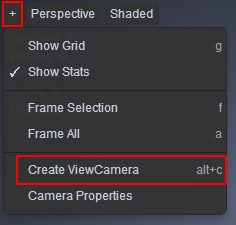
In the viewport, click on the +** icon (located on the upper left corner), and then click on **Create ViewCamera.
Using the keyboard shortcut, Alt + C

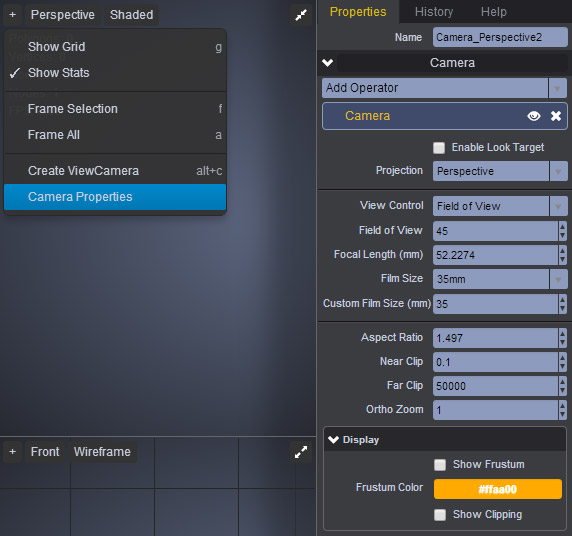
Next, you’ll need to change your Camera Projection type to Orthographic from the Properties panel.
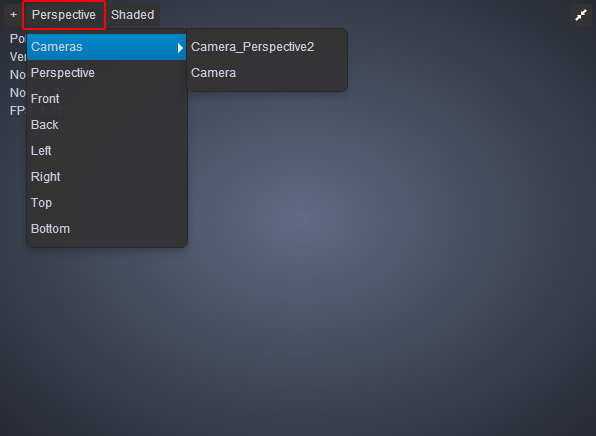
If you have more than one Camera, and you need to make sure you’re looking through the right one, simply click on the Perspective selection menu (located on the upper left corner of your viewport), and make a selection from the Cameras sub menu.
Note however, Orthographic Cameras can only Pan and Zoom. They cannot be used to orbit around your scene.