
Under the Tools tab you can find all the important modeling functions. There are also other tools worth mentioning as they will significantly improve your modeling process.
The Tools tab, located at the far left of the interface, is where you’ll find the main modeling functions. Some of the same actions can also be accessed from the main menu.
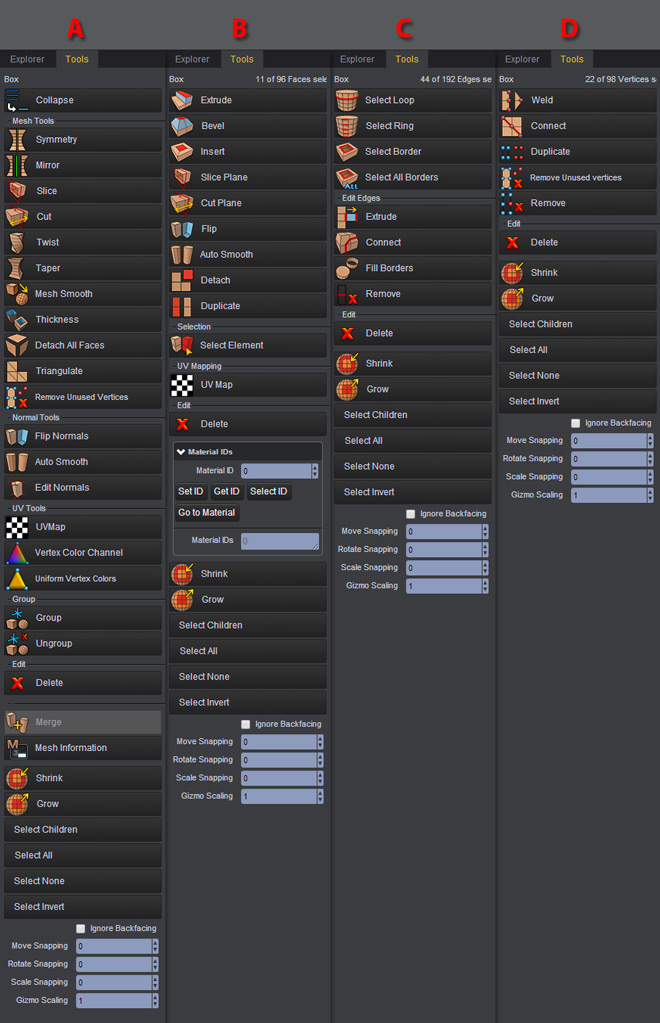
A - Displays the tools applicable in Object Mode
B - Displays the tools applicable in Face Mode
C - Displays the tools applicable in Edge Mode
D - Displays the tools applicable in Vertex Mode
You can learn more about this in the Modeling Tools section.
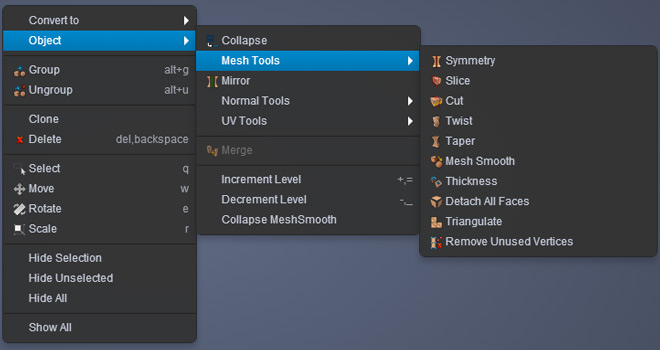
The same modeling functions can also be found in the context menus, which appears when you right-click on the 3D viewport. The right-click menu functions apply to your selected models and components.
Clara.io includes several different status views that can help you with your modeling tasks.
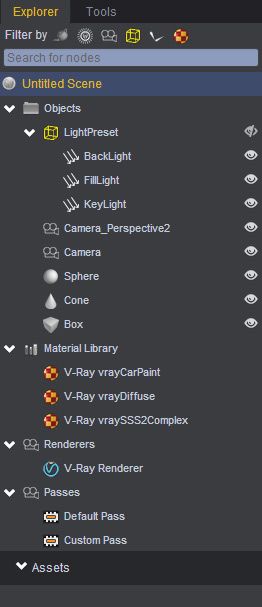
The Explorer displays the objects contained in your scene. It allows users to select their objects directly from the list or even switch to different views based on object types. This includes: PolyMesh, Light, Camera, Null, Bone and Materials. For more information, refer to the Explorer section of this guide.
The Operator Stack displays the actions applied to your model. Every now and then, you will need to hit the Collapse button to bake all of your actions.
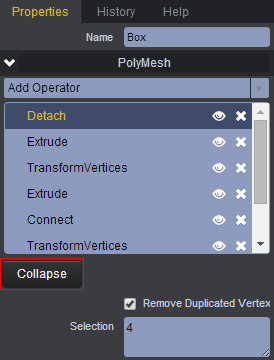
For more information about the Operator stack, refer to the Operator section of this guide.
You can easily make Clones or Reference models from the Right-Click menu or by going to Edit > Clone. After selecting the Clone command, Clara.io prompts the user to choose between a regular Clone or a Reference.
A Clone is an exact replica of the original model that can later be modified to your liking without affecting the original mesh.
A Reference is a replica of your original mesh that follows all actions made to your original mesh simultaneously. This is useful when modeling one half of your character and have the other half reapply the actions automatically. In a case like this, the Reference model needs to have a negative scaled on the same axis. For example, if you’re building the original mesh around the X-axis, then you’d want to make your Reference model have a -1 scale on the X-axis.
A Symmetry function duplicates your selected model in the opposite direction. This is useful when you’re done modeling one half of your character and would like to reapply the other half. If you were using a Reference model for the second half, you’d have to delete it at this point before applying a Symmetry function.
You can find more information about the Symmetry Operator here.
Throughout the modeling process, you will be moving meshes and components around the scene. This means objects and components will be translated, rotated and scaled as needed to get the desired result. To learn more about Transformations, refer to the Transform Manipulators section.
There are a couple of Shade View options that can be useful when modeling.
For example:
The Shaded mode creates a virtual headlight shining into the scene from the position of the camera. It is useful when you want to see the shadowed parts of scene objects. This will give a proper volume of your model’s physical shape.
The Realistic view is useful during the lighting process. This gives an approximation of the diffuse, ambience, and specular effects influenced by the lights in your scene.
The Wireframe view creates a transparent view of your object, revealing only the outlines of your model’s topology. It can be useful for seeing through the topology when modeling tight areas.
The Bounding Box comes in handy when your scene becomes extremely heavy and you need more fluidity navigating. Switching to this view mode converts the shape of your model into a transparent box representing the approximate space your object takes up.
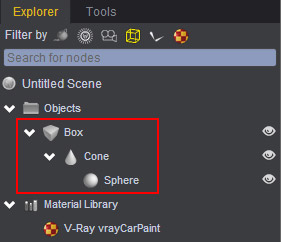
There are times when you’d want to organize the objects of your scene into a hierarchy. This can be done by parenting models together. Simply drag and drop the child mesh into the parent mesh from the Explorer. Now your child objects will automatically follow the parent object when translated, rotated or scaled.
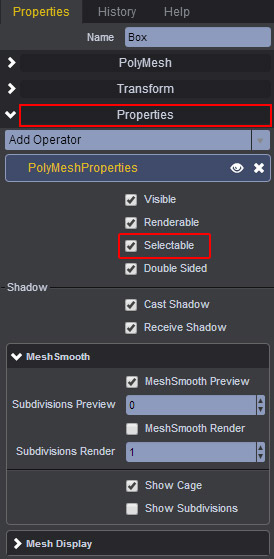
Often times you will run into situations when your scene will contain many meshes, and you’d only like to focus on one of them without accidentally selecting the others. In a scenario like this, you can disable the selectability of an object. This can be done by selecting the object first. Next, view the Properties tab, open the Properties panel and then uncheck Selectable.
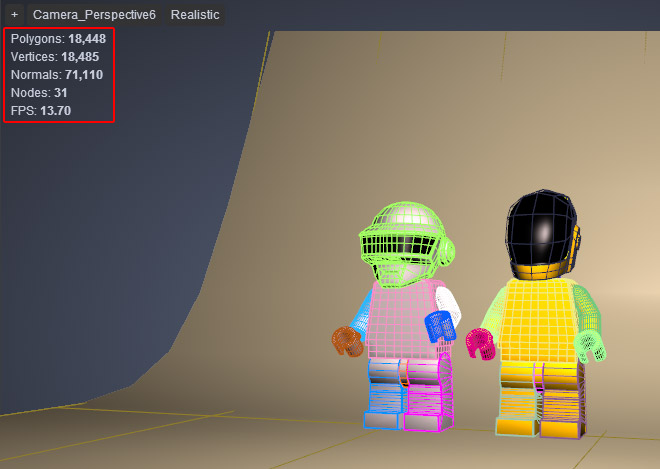
It is a good practice to keep the status of your scene visible from the view port. This will display the number of Polygons, Vertices, and Objects, and also the Frames Per Second (FPS) of your Clara.io WebGL viewport. This can be enabled by accessing the + sign located at the upper left corner of your viewport.
At some point, close to the end of the modeling process, you’ll want to smooth out your geometry by adding subdivision. There is a quick and eay way to preview the subdivsion result. With your mesh selected, simply hit the plus (+*) sign on your keyboard to subdivide it once. Hit *+ again to increase the subdivision level. To go back to its default level, simply hit the negative (-) the same number of times to undo.
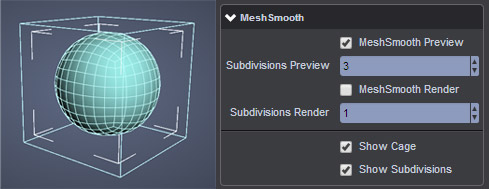
In a state of Subdivision Preview, you can also choose to disable the visibility of the original low res wireframe (surrounding the subdivision preview). With the mesh selected, apply a Subdivision Preview. Now go to the Properties tab, then under the Properties panel, go to MeshSmooth and uncheck Show Cage.
To make the subdivision’s wireframe visible, check Show Subdivision, in the same section.
To learn more about Subdivisions, click here.